Wednesday, December 26, 2012

Celebrate the Season with Stuffed Heirloom Squash


Winter squashes are something I look forward to each year, especially after I began growing my favorite variety - the gorgeous Stella Blue Hokkaido (pictured above, center). It has a curiously blue- green skin and delicious, dense, rich orange flesh. 

I made quite a gorgeous and festive dish for the holidays by stuffing the squash with a tasty rice preparation that works very well when made ahead of time, then assembled and heated for your dinner.


Tips for Success with Stuffed Squash
The trick is to roast the squash as prepared above in the photo, before you stuff it. Carefully cut the top off to form a bowl, and score the inside. Rub lightly with olive oil or butter to keep it moist.

I baked mine at 400 F for about 30 minutes. The squash meat should be just tender - not mushy. Take care to check it while roasting so that it doesn't get too soft and collapse. 

While the squash is in the oven, a simple and versatile stuffing can be made with cooked rice (I used brown rice mixed with wild rice) flavored with sauteed onions, celery, herbs, (thyme, rosemary) and mushrooms. Saute the onions and additions separately then mix with the rice in a bowl. Adding chopped nuts such as pecans or walnuts and a handful of raisins creates a tasty dish appropriate for holidays celebrations.

Spoon the mixture into your partially baked squash, then return to the oven at about 350 F for 30 minutes to heat it thoroughly before serving.


Growing Winter Squashes
A beautiful harvest of Stella Blue Hokkaido, pictured below. Squashes are easy to start from seed, and by growing your own you'll have the best choice of heirloom varieties. 

Although direct planting into a prepared mound is often recommended (with good compost or organic fertilizer), I've had success starting my seeds in containers and transplanting the seedlings after they have developed leaves and are about four inches high.

Plant in spring as soon as the temperatures at night are in the 50's F and the soil has warmed, so that you get as much warm weather growing time as possible. They like regular water and grow quickly with a sprawling habit, so give them room on the ground or let them climb up a trellis. If you let them climb, you'll have to provide support when the squashes develop so they don't fall off!

Check Seed Saver's Exchange and Seeds of Change for seeds.


The beautiful Stella Blue Hokkaido squash is my favorite

Photos: Patricia Larenas, Urban Artichoke

Sunday, November 11, 2012

Kale Season at the Chez TJ Potager


This fall I'm obsessing over kale. It began when I tasted a shredded raw kale salad made right out in the garden last spring. It was simply dressed with lemon, tamari, and sesame seeds. Strawberries added a bright garnish and flavor. It made an impression on me, so when fall approached I planned to test a few different varieties, and sowed some flats for seedlings.

Kale Likes it Cool
Kale is a cool weather crop that can be grown fall through spring in the temperate San Francisco Bay Area. It tolerates frost, as does lettuce, broccoli, cabbage and Swiss chard. Plant these in the early fall to enjoy over the winter. Cold weather and frost are said to contribute to better flavor and texture for kale.

A Rainbow of Kale 
At the Chez TJ kitchen potager, I harvested our first Lacinato Rainbow kale crop for the kitchen a few days ago. The seedlings were planted in September and they grew quickly. This pretty kale has beautiful purple-pink stems and tender frilly leaves; it's a handsome plant for the winter garden. 

I discovered that it is a hybrid made by Frank Morton who crossed Tuscan kale, (also known as Lacinato or Dinosaur kale) with Redbor kale. It looks very much like Red Russian kale. This caused some confusion, as at first I thought it had been mislabeled!


Lacinato Rainbow Kale is a cross between Tuscan and Redbor kales 

This weekend I added Tuscan kale to the garden (Dinosaur kale) that I grew from seeds at home. 

Tuscan kale is also called Dinosaur or Lacinato kale

Tuscan kale has evenly dark green, elongated leaves that have a pebbly suface. It's tender and flavorful - a popular item at my farmer's market.


Ornamental kale 

The beautiful purple, pink, and gray-green ornamental kale above is planted in my front yard bed among lettuce, onions and Red Russian kale - it makes a striking centerpiece. Ornamental kale is edible, but don't eat it if it wasn't grown organically, as it may have been sprayed with pesticides and cultivated with synthetic fertilizers.

Simple Kale Saute
A simple way to enjoy kale is to saute it in olive oil over low heat:
1. Thinly slice a bunch of kale (that has been rinsed in water  first) crosswise, leaving the stems for the compost pile.

2. Saute a clove of chopped garlic for a few minutes in the olive oil, then add the sliced kale. Toss it gently while cooking to make sure it cooks evenly. Taste after a few minutes to test if it's done enough to your liking. 

3. Season with a sprinkle of kosher salt, and add a few drops of lemon or balsamic vinegar before serving, if desired. 

You can also toss the sauteed kale with cooked pasta or rice and sprinkle with toasted sesame seeds. This dish is good cold or warm, and thinly sliced red sweet pepper is a nice addition for color and bright fresh flavor. Or serve tender white beans on a bed of sauteed kale (below).

Sauteed kale with Italian Butter beans


Photos: Patricia Larenas, Urban Artichoke

Friday, November 2, 2012

How to Prune Your Blackberries


Pruning your berry bushes can seem like a daunting task, but it doesn't have to be complicated. That's what I learned recently when I joined experienced horticulturalist Debbie Stern, head gardener for Rosiland Creasy, to lend a helping hand, but mostly to learn.

Since most berries are vigorous growers and will happily spread wherever they are planted, the ideal is to keep them under control from the beginning. I've been hesitant to plant any because of the potential for a berry take-over of my garden. But I got over my berry fear by learning hands-on how it's done.

See below for the basics you need to know and the four-step pruning method:

Debbie Stern finds the old fruited canes and makes the first cut

Pruning Cane Fruits - the Basics
In general, cane fruits (also known as bramble berries) such as blackberries, raspberries and hybrid berries, are pruned by cutting the canes down to the ground after they have finished fruiting.

New fruit is produced from new canes, so you must be careful to identify which canes haven't fruited, and save those for next year's crop of berries. If you wait to prune in late fall or in winter, you'll be sure to get the all of berries for the season.

Exception: for "everbearing"raspberries that fruit in summer and fall, then again the next spring, you only prune the top of the canes that have fruited, because those canes will be the spring fruting canes. Refer to:  Edible Landscaping, Rosiland Creasy, 2010.

If you can, take advantage of the thornless cultivars of blackberries, such as Black Satin, Arapahoe, Apache and Navaho. Black Stain is the variety in these photos, and a favorite of Rosiland Creasy.

You might recognize the colorful wall below from photos in Creasy's excellent book on edible landscaping. The are kept well under control in her front yard (below) by yearly pruning and produce lots of luscious berries.

Thornless "Black Satin" blackberries against a colorful wall

Pruning Blackberries in Four Steps
By pruning the canes every year and digging out any suckering canes, and uprooting any that have rooted when they touch the ground, the berries can be prevented from unwanted spreading.

Read through all of the steps first before beginning:
1. Find the fruited canes by looking for signs of fruiting (you'll see where the berries were attached and have been harvested, or find old berries the weren't harvested) and cut the cane by several feet.

2.  Find each cane that you cut and trace it back down to the ground; cut it off at the ground. Do this for all of the fruited canes. Be careful not to damage tender non-fruited canes, as they're usually all tangled together.

3. You should now have only canes that have new growth and no sign of fruiting; they are usually very green and supple. Choose three healthy canes to leave for next year's berry crop. Pick canes that are not too thin, but not too old and thick either so that they will develop vigorously.

Leave only three canes for next year's crop

4. Cut down to the ground and remove all non-fruited canes except the three that you picked. Tie these onto your trellis using twine in a figure-eight loop to create a little space between the trellis and the cane. Done!

From just three canes you will get lush growth. You may be tempted to leave more, but it may lead to more work than you planned for next fall to untangle and prune your berries. Experiment and see how your particular berries grow.

Tie the three remaining canes to the trellis - done!

For more about pruning berries and lots of other valuable information on growing edibles refer to:
 Edible Landscaping, Rosiland Creasy, rev. ed. 2010.
Pruning and Training, Christopher Brickle and David Joyce, the American Horticultural Society, rev. ed. 2011.

Photos: Patricia Larenas, Urban Artichoke


Thursday, October 18, 2012

Rosalind Creasy's Garden: Edible Landscaping with Color


Anyone familiar with Rosalind Creasy's landscaping design savvy knows that she is a champion of color in the garden.  As the guru of edible landscaping - her first book on the subject was published in 1982 and she has since published numerous others - she integrates edibles beautifully in stunning arrangements throughout her front and back yards. 

Recently, I was lucky enough to be invited to spend a few weeks working in her remarkable gardens and meet Creasy and her knowledgeable, amiable staff.

Rosalind Creasy welcomes APLD members on a tour of her garden
It Takes a Village 
When the opportunity arose to assist her regular gardeners in preparing for a tour of her garden by the Association of Professional Landscape Designers (APLD) last September, I jumped at it. My friend and budding landscape designer, Susan Stansbury, and I were welcomed warmly to the prep team. 

The Creasy prep team (left to right): Valerie Williams, Susan Stansbury, Debbie Stern (Gudi Riter in background)

There we met head gardener Debbie Stern, intern Valerie Williams, and Gudi Riter, gardener and personal assistant to Creasy. Besides meeting and chatting with Rosalind Creasy, making new gardening friends was the highlight of my time spent in these beautiful gardens.

Detail of front arbor with hops

Our mission was to prepare the substantial garden beds, including every nook and crany, to be inspected by knowledgeable landscape designers. Many of the designers were not likely to be familiar with landscaping with edible plants, therefore the pressure was on to impress and demonstrate that edibles have a place in the suburban landscape. 


Entry to front yard garden

A Feast of Color
Creasy has devoted her career to educating others about the the beauty and utility of including vegetables, fruits and herbs in the home landscape, including the front yard. Creasy's gardens are lovely, and although the various garden "rooms" are lush with edible plants, they are not immediately obvious since the first thing you notice are the brilliant colors. 


The hybrid Enchantment tomato is a Creasy favorite for sauces

She has a special talent for using edibles in unexpected and delightful ways, like the hops that frame the front yard arbor, and another arched arbor covered in  luscious climbing "Enchantment" tomatoes, gorgeous hybrid roma-type tomatoes, of which Creasy is particularly fond (seeds available from Burpee).


Front yard feature: an archway of trellised Enchantment tomatoes

Flowers are bountiful throughout, and besides a riot of color, they provide food for pollinators and a lush habitat for birds, elements that are important for a balanced, healthy, ecosystem for the garden.


The Queen Elizabeth heirloom iris blooms twice a year

Gardening for a Small Planet
Why such passion for landscaping with something you can eat? As resources such as water and fuel become increasingly precious, and our agricultural lands are burdened with serious pesticide and herbicide contamination, producing food locally increasingly makes good sense.

Creasy has been determined to spread the message of gardening (and cooking) with edibles since the 1970's when it was not fashionable to show off the veggie garden in front yard suburban landscapes.

Creasy has designed a serene sanctuary in her heavily shaded backyard

I asked her how she had the fortitude and sheer guts to keep up her work when it earned her a reputation as an oddball in landscape design circles. She stated flatly that she simply "knew it was the right thing to do".


Rosalind Creasy's head gardener Debbie Stern, and APLD tour group

Not one to rest on her laurels, Creasy is as busy as ever, gardening, lecturing, and writing.  And as she enjoys the rising popularity of gardening with edibles in suburbia, she has every right to shout from the rooftops: 

I told you so!

A cleverly designed "tomato house"makes a surprisingly lovely feature in the backyard


Just call me the "hedge whisperer"


Photos: Patricia Larenas, Urban Artichoke

Saturday, September 8, 2012

The Beans of Summer: Rancho Gordo Bean Buddies


Besides growing my usual must-haves, which are snap beans such as Emerite, Royal Burgundy, and runner beans to dry for winter cooking, I grew beans sent to me through Rancho Gordo's Bean Buddies project to trial in my garden this summer. Rancho Gordo initiated this project with gardeners in order to get feedback on the germination, growth, and eating qualities of selected beans.

Shown in the photo above, the seeds I received were: Rattlesnake, Madeira, Jackson Wonder (a lima) and Florida Butter.
I planted all of them, and all grew except the Florida Butter beans (I think I planted too early - not warm enough?).

My summer garden is waning now and I'm collecting all the beans seeds that I can. Since I received very few seeds I figured I would expand them to plant next year and then test them in the kitchen. My dried seeds are in the photo below. I only grew two Madeira bean plants. I had five seeds that survived the shipping, and planted three. I like to keep a couple of beans to compare my own dried seeds with.

Madeira beans have pretty cranberry swirls and the same rosy color on the pod; I'll bet it's a tasty variety for cooking.

Madeira bean pods look like Cranberry bean pods
  
I didn't eat any of the Jackson Wonder either as I had only a few plants. This one is a bush lima with lovely seeds; I'll save these and also do an expanded planting next summer.


Dried beans clockwise from left: Jackson Wonder, Rattlesnake, Madeira

Rattlesnake Beans

The Rattlesnake beans are fantastic - wow. I ate a few as snap beans, but I saved most of the harvest for seeds. They have great rich flavor as a snap bean and are incredibly tender. They do have a bit of a string, unlike the beans I usually grow to eat fresh, such as Emerite. But they're so good it's worth bothering with the string. I won't have enough to  eat as dry beans, but perhaps next season!

Rattlesnake beans are mottled with purple

The Bean Buddies project is a generous undertaking by the folks at Rancho Gordo. I loved getting a selection of beans in the mail; it was like getting a special present.  I've never grown any of these before so it was a nice addition to my summer garden and I'm thrilled to discover new beans to grow and enjoy.


My backyard garden beds with bean teepees and a trellis of Rattlesnake beans


Photos: Patricia Larenas

Monday, September 3, 2012

Farewell to Summer: My Garden Photo Album


 Images From My Summer Garden
I love sharing my passion for gardening and hope you've found bits of encouragement, inspiration, or simply enjoyed a beautiful image in my posts now and again. 

Here are some images from my edible garden this summer that I haven't published previously that I hope you enjoy:

The Russian Malakhitovaya Shkatulka green tomato pictured above, was the star of our garden this summer, for both flavor and beauty.

Growing cherry tomatoes are a must every summer. Cherry tomatoes usually ripen early and are abundantly productive. If my larger-sized tomatoes fail, I can count on having beautiful cherries and not miss out on summer tomatoes entirely.


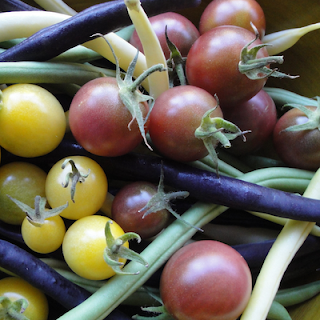
I've discovered really gorgeous cherry tomatoes shown in these photos: Black Cherry and Lemon Drop; I think you can tell which is which!


Gardening is full of interesting and fun surprises: this is the second summer in a row that a bright yellow, jelly-bean shaped tomato  (below) has seeded itself in my garden. This time it grew among a patch of irises in a dry area.


 I've never grown this variety and we've never bought any tomatoes like this one. Perhaps it grew out from a crossed tomato? This time I'm saving the seeds, as it has good flavor and production.


 Another one of my favorite summer surprises this year is the delicately colored nasturtium that volunteered to grow in a vegetable bed, apparently enjoying the company of Romano beans and French marigolds. 

Nasturtiums easily self seed and I've planted a few different types in the garden over the years, but I don't recall this one. The flowers start off pale yellow with red blotches then develop a rosy blush as they age.


 I'll save the seeds but I don't know if they will grew true next year- it's part of my experimental approach to gardening!

Lemon Queen sunflowers are showy and brighten up the garden. I grew them in my front and back yards this summer.  Bees love this particular sunflower and birds enjoy the plentiful seeds from the smallish flower heads after they have dried.


 Did you know that some sunflowers are bred to not produce pollen? It's so they won't drop "messy"pollen when they are used as cut flowers indoors. So if you hope to share them with bees in your garden, make sure they aren't the hybridized no-pollen type. 

I learned the hard way!


Runner beans are growing in several spots throughout my garden. They are ornamental as well as a nutritious edible. Runner beans are hardy, have pretty flowers in a range of colors and can climb up a trellis 10 to 12 feet high. The flowers and pods are edible, and you can save the dried beans to cook during the winter.

Plus they will happily grow back in the spring from rhizomes left in the ground after they have died back with the first frosts of winter.

The Spirit of Gardening 
I hope you too have enjoyed the bountiful gifts of summer, and if you aren't able to have your own garden, this post is dedicated to you!

Photos: Patricia Larenas, Urban Artichoke

Sunday, August 26, 2012

A Russian Green Gem: Malakhitovaya Shkatulka Tomato


Like legions of gardeners across the country I'm always on the lookout for a tasty tomato to grow. The open-pollinated Malakhitovaya Shkatulka is my favorite from this summer's harvest - indeed, it's a real gem, true to its name.

Typically, I vow to grow the tomatoes I love best from our harvest again next summer, then I end up growing varieties that are new to me. Often it's a matter of opportunity. I got the seeds for Malakhitovaya Shkatulka free at a seed swap last February, and the photo looked so beautiful I just had to try it. I'd never heard of it and I struggle with its Russian name, but you can bet that I'll be saving the seeds to plant next year (at least that's my plan).


A Russian Jewel
It really is a gem, as its name suggests: Malakhitovaya Shkatulka means "malachite box" in Russian (Малахитовая Шкатулка).  Malachite is a gem used for jewelry and at one time was also used to make jewelry boxes. The tomatoes are large: my bigger ones reached 3/4 lb each, and have a beautiful green skin that is blushed with an apricot hue as they ripen.  Another plus about this tomato is that it doesn't seem to mind mild summer weather as is typical in the San Francisco Bay Area, so growing Russian tomatoes in the cooler parts of the US makes sense.

This tomato has a very satisfying tomatoey flavor in line with other low acid varieties, such as Brandywine. I think another of its outstanding features is the gorgeous color, especially in a simple sliced tomato salad with red onion, fresh basil and a drizzle of olive oil and balsamic vinegar. 

That's what I use as a taste-test standard and the first thing I eat every summer with my freshly ripened garden tomatoes.


Seeds with Stories
This particular variety appears to have come to the US in 2007 according Tatiana's TOMATObase web site. Tatiana Kouchnarev acquired the seeds from Tamara Yaschenko of Biysk, Siberia, Russia, in 2006 in a seed exchange.  Tatiana in turn offered it in the 2007 Seed Savers Exchange Yearbook, where it was then requested by Jere Gettle of Baker CreekHeirloom Seeds, and it was offered in the 2008 catalog. Gettle brought it to the EcoFarm seed swap last February, where I snagged a packet and grew it this summer. The tomato originated in Russia at Svetlana Farm.

A dizzying number of tomatoes of many colors, shapes and sizes are available to the home gardener who is willing to grow from seed.

Have you grown this tomato before? Would you grow it again, and where are you located?

Photos: Patricia Larenas, Urban Artichoke

Saturday, August 18, 2012

Strawberry Sherbet with Homegrown Strawberries

-->

I’ve been harvesting lots of  berries starting in spring through the summer from my modest three by four foot strawberry patch in my front yard, so I was inspired to try them in this easy sherbet recipe. I figured that if I’m going to eat something with sugar and dairy in it, it may as well be made with high quality ingredients, in other words, homegrown and homemade.  

See my version below of a basic recipe I found at Eat Drink Love, that uses only 2 cups of fresh berries, and scroll down for a photo of the strawberry bed in my front yard edible landscape.


 The 2 cups of berries in this recipe is not a huge amount and very doable for the home garden.

Making sherbet with milk and a variety of fresh berries is simple and gives spectacular results. Instead of making ice cream, which is incredibly high in dairy fat and eggs yolks as well, I think you'll agree that sherbet is a fantastic alternative. You can use other types of berries too. I've also used fresh berries that we've kept frozen, and in combinations.

-->
Fresh Strawberry Sherbet Recipe

You Will Need
2 cups fresh organically grown strawberries, hulled and rinsed
1 tablespoon fresh lemon juice (Meyer lemon if available)
2 cups organic whole or low fat milk
1/4 to 1/2 cup of sugar
½ teaspoon high quality vanilla
Pinch of sea salt

Three Step Strawberry Sherbet Method
1. Put all of the ingredients into a blender or food processor and blend until smooth.

2. Chill the mixture until it is very cold for best results (2 or more hours).

3. Churn in an ice cream maker, about 20 – 30 minutes until very thick, then freeze 2- 3 hours or overnight.( This works well in my Cuisinart ice cream maker with a well chilled bowl that I keep ready in the freezer, but you should follow specific instructions for your brand of ice cream maker).

-->

 Conventionally Grown Strawberries: The Dirty Truth
Eating freshly picked berries is heavenly, since you’ll get the best flavor and ripeness. A lot has been written about conventionally grown strawberries because they are notoriously grown with high inputs of fertilizers, pesticides and fumigants, and they don’t even taste very good since they are often picked when under-ripe.

By growing your own strawberries you can be sure they aren’t laced with pesticide residues and that soil-destroying fumigants weren’t used. You can also find organically grown berries at your farmer’s market, but unfortunately it’s likely that the stock plants were produced by using fumigants and pesticides.

Read more about growing your own strawberries in Eat Drink Better’s Becky Striepe’s post, and read a peer reviewed scientific study about the advantages of organically grown strawberries versus conventionally grown here.

 This post was also published on Eat Drink Better

Photos: Patricia Larenas, Urban Artichoke


Monday, August 6, 2012

What is Sustainable Gardening? My Test Case with Surprising Results


Replacing an old juniper hedge with a beautiful flowering, edible rosemary hedge that bees love is a good thing, right? In my sustainability analysis I'm surprised at my conclusions, but at peace with my decision.

Sustainability: What it is
What is meant by sustainable practices? At its core, it means taking into account the impacts of our actions on the environment, on people, and on economic concerns, so that we don't compromise the future. Deciding on whether to replace my standard- issue suburban juniper hedge with a rosemary hedge turned out to be a good test case. Here's why:

Sustainable gardening puts to use the principles of sustainability, and there is actually a document to point to for these so called Hannover Principles, also known as, a "Bill of Rights for the Planet", which are used as guidelines. They are credited to William McDonnell Architects and were developed for an  EXPO held in Hannover, Germany.

Recently I had a chance to apply these principles to my hedge replacement plan. I took a short course on  sustainable practices  through my horticultural program this summer and it was a good eye-opener that got me thinking deeper about my own approach to gardening. I have to give credit to instructor Frank Niccoli, a sustainable landscaper who teaches in my Environmental Horticulture and Design program.


My Test Case
We inherited the junipers when we bought our suburban home, and I've never found them attractive, in fact they irritate me.  They don't flower, they are prickly, and I don't like their odor. They are leftovers of gardening practices popular in the 50's and came with our house.  In contrast, rosemary is an attractive shrub with lovely sky blue to purple flowers that attract bees, has a wonderful fragrance, is useful in the kitchen and can be pruned into a hedge. It's also drought tolerant. On the surface it seems like an obvious decision to go ahead with my replacement scheme.

But I applied sustainable principles in analyzing my plan and I was surprised at my conclusions. See if you agree.

My Analysis
To remove the juniper hedge I would have to:

1. Pay someone to take out a row several feet long of these shrubs.
2. Pay to have the roots removed so that I could plant something in their place; leaving any roots means they might grow back.
3. Pay to have the waste from the shrubs be disposed of at the dump, because they cannot be used for mulch.

Additionally,
4. The energy use involved in removal and transportation to the dump are costs to the environment (pollution and use of petroleum based non-renewal energy).
5. The truckload of yard waste is needlessly adding to the landfill, which is a societal cost, since garbage keeps coming, but landfill space is limited.

The Benefits of Doing Nothing
Sometimes the best thing to do is nothing; here are the arguments for keeping the junipers:

1. The juniper shrubs have the advantage of being drought tolerant which is very important in my dry California climate.
2. There are currently no monetary or environmental costs to keeping the juniper hedge as is (I've been hand-pruning for the past several years).

My Conclusion
Sadly for my rosemary hedge fantasy, the resources required to replace the junipers with something I happen to like better far out weigh the benefits. Part of the equation is that I already have several rosemary bushes that provide herbs for my kitchen and flowers for bees. I also grow a profusion of other herbs and flowering plants that benefit my garden ecosystem.

Thinking in a New Way
“Sustainable design is not a reworking of conventional approaches, and technologies, but a fundamental change in thinking and in ways of operating–you cannot put spots on an elephant and call it a cheetah.”
- Carol Franklin, Andropogan Associates LTD.
A sustainable approach to gardening and to our lifestyles in general, means that we take a global approach to everything we do by weighing the impacts. For the gardener this means that we consider the inputs and the outputs of our home gardening practices. This simply means  that a minimum, we think carefully about the types of plants that we grow and landscape with, fertilizers we use, and what we do with garden waste.

In my test case the arguments in favor of replacing the juniper hedge with pollinator-attracting rosemary are weak when considered in the context of my particular garden.

Therefore, the junipers will live to see another day and having realized the real costs, it's a decision I can live with.

Photo: Patricia Larenas, Urban Artichoke

Sunday, July 29, 2012

Fresh From the Garden: Easy Refrigerator Pickles


I love simple and easy recipes for fresh produce, so when I came upon this recipe and method for refrigerator pickles I jumped on the pickle bandwagon. I’m new to pickling, but my lemon cucumbers are at their peak so I used them for my first pickle experiment.

(To see the recipe scroll down beyond the  photo below)

What are refrigerator pickles?
Refrigerator pickles are kept in the refrigerator since they are not processed and sterilized through a canning method. The vegetables used for these pickles are usually raw, but I found that using blanched green beans works really well and is a nice addition to the cucumbers.

All it takes to make up a quick batch is to measure out the water and vinegar into a jar, add salt and sugar, add spices to your liking, then add the vegetables. Refrigerate for a couple of days and enjoy. Daphne, from Daphne’s Dandelions blog, says that the pickles will last a few months prepared this way.

Another huge plus is that you can add vegetables to the jar as they ripen so you don’t have to fill the jar right away. Just prepare the pickle juice with the spices, refrigerate, and add vegetables as you have them available.

That's my kind of easy!

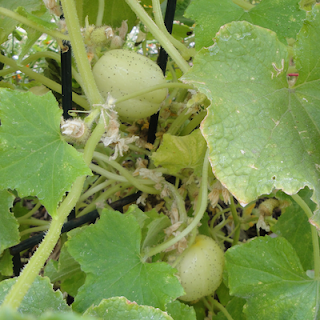
Lemon cucumbers love to climb

Here is Daphne’s method from her blog -

Daphne’s Easy Refrigerator Pickle Recipe

1. Combine in a quart jar:

¾ cup water
1 cup vinegar (rice vinegar is my favorite mild vinegar and works well in this recipe)

2. Add and stir to dissolve:

1 tablespoon salt
3 tablespoons sugar

3. Add spices and flavorings. I used:

2-3 whole cloves
½ teaspoon whole coriander seeds
2 or more sprigs of fresh dill or tarragon
1 small red onion, quartered
2 or more peeled garlic cloves

4. Add cucumbers:

3 – 4 lemon cucumbers, quartered lengthwise
Optional: blanched whole green beans, ends trimmed

Cover the jar with a lid and refrigerate for a couple of days to allow the spices to flavor the vegetables.

The spices I used in my version of her recipe resulted in tasty pickles but there is a lot of room for experimentation and trying a variety of spices and flavors. Use herbs and vegetables right out of your garden or  have fun foraging at your farmer's market for produce to use. 

The green beans are especially good – I cooked them in boiling water for only a couple of minutes, drained them, then added them to the prepared jar. They were crisp, tender and delicious.

A plate of fresh, chilled, pickled veggies makes a refreshing summer appetizer or is perfect for picnics, and as a garnish for salads.

You'll most likely enjoy them as a snack right out of the jar - they're a perfect taste of summer.

The Lemon cucumber vines trellised up into my Lemon Queen sunflowers

Photos: Patricia Larenas, Urban Artichoke